Netbeans is an IDE (Integrated development environment) originally for Java. However version 6.9 (but not 7) can also be used with Ruby and JRuby. Because it's an IDE for Java, Netbeans is ideal for setting up JRuby on Rails projects. And here is how.

Netbeans comes with it's own bundled version of JRuby (1.5) so go to Manage Ruby versions to set a different version or even a C-Ruby version if you want.
The server needs to be set to Webrick to get the normal Ruby on Rails server.
If you are setting up a JRuby on Rails project make sure you mark the: "Access Database using JDBC"
And like that you have a properly configured Rails file for JRuby, without having to use the "--template" option. Go check the Gemfile and see for your self.

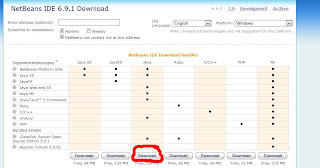
- First make sure you Download the Java version of Netbeans 6.9.1 or the complete version. It's easier to add Ruby plugins to the Java Netbeans than viceversa.
- Install the Ruby plugins to Netbeans.
- Create a new project and follow the screen shots below.
Netbeans comes with it's own bundled version of JRuby (1.5) so go to Manage Ruby versions to set a different version or even a C-Ruby version if you want.
The server needs to be set to Webrick to get the normal Ruby on Rails server.
If you are setting up a JRuby on Rails project make sure you mark the: "Access Database using JDBC"
And like that you have a properly configured Rails file for JRuby, without having to use the "--template" option. Go check the Gemfile and see for your self.


Comments
Post a Comment